In the evolving landscape of architectural design, digital tools have become indispensable. For aspiring architects, selecting the right software is a crucial step in developing design and documentation skills. This article delves into the various software options available, offering guidance on choosing the most suitable tools based on project requirements and user proficiency.
Whether you’re navigating through university assignments or self-teaching, understanding the functionalities and applications of different software will streamline your workflow and enhance your design capabilities.
Digital Tools in Architecture
The landscape of architectural design has been fundamentally transformed by digital tools. These tools are not just supplementary but central to the modern architect’s toolkit. Universities often provide courses or modules to familiarize students with these digital resources. Typically, students encounter practical applications during project work, where they are encouraged to utilize specific tools for design, documentation, and presentation purposes.
Understanding and choosing the right tool can be daunting due to the plethora of options available. This article aims to simplify this decision-making process. We will categorize these tools into two primary groups: two-dimensional (2D) and three-dimensional (3D) tools, discussing how each category aligns with different stages of a project and its specific requirements. This approach is designed to help beginners identify the most relevant tools, optimizing their workflow, and preventing unnecessary expenditure of time and effort.
How To Choose The Right Architectural Tool
Selecting the appropriate digital tool for architectural tasks involves several key considerations:
- Project Objectives and Information Needs: Understand the goal of your task and the most efficient path to achieve it;
- Tool Functionality and Capabilities: Evaluate what the tool is specifically designed for and its suitability for your task;
- Learning Curve: Consider how user-friendly the tool is and the time investment required to master it;
- Ease of Use: Assess the tool’s usability and the time needed for setup and application in projects;
- Cost Considerations: Determine the tool’s affordability, especially about student budgets, and explore the availability of free student versions.
Project Information Requirements
Architectural projects typically progress through eight phases:
- Pre-Design and Establishment;
- Concept and Schematic Design;
- Design Development;
- Planning and Development Approval;
- Construction Documentation;
- Contractor Selection;
- Contract Administration and Construction.
Defects and Post-Construction
In academia, the focus is often on the initial three stages: Pre-Design, Conceptual Design, and Design Development. These stages are more about exploring broad ideas and potential design directions. As the project progresses, the need for detailed and specific information increases, particularly during the Construction Documentation stage, where precise instructions for construction are necessary.
Recognizing the required level of detail for each phase and tailoring your digital tool choice accordingly is crucial for effective project management.
Functionality in Architecture
When considering digital tools, it’s essential to understand the following key concepts:
- Two-Dimensional (2D) Tools: These involve working on flat planes, focusing on length and width dimensions, akin to drawing on a digital paper plane;
- Three-Dimensional (3D) Tools: These involve creating objects with volume, considering length, width, and height, and placing elements in a digital space;
- Computer-Aided Design (CAD): This involves using computers to assist in creating 2D or 3D drawings, primarily focused on drafting;
- Building Information Modeling (BIM): This is a digital representation integrating all design disciplines in a cohesive model, useful across design, construction, and operation phases;
- Each tool, whether 2D or 3D, has its unique function and relevance at various project stages. Familiarizing yourself with these functionalities will help in selecting the most appropriate tool for each task.
Overview of Specific Digital Tools
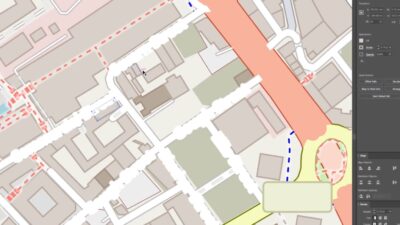
Photoshop (Adobe) – Image Editing
Created: 1988
Photoshop is a versatile image editor used across various professions. Its primary function is pixel-based image manipulation, suitable for color correction, cropping, and combining images. While it’s an excellent tool for editing photographs and creating collages in architecture, it’s not designed for scale drawing or multi-page document creation.
Pros:
- Widely used with cross-platform compatibility;
- User-friendly with extensive tutorials and support;
- Broad capabilities for general image editing;
- Industry-standard with a familiar interface across Adobe products.
Cons:
- Limited as a raster graphics editor; not suitable for scaling;
- Not designed for multi-page document creation;
- The extensive interface may be initially overwhelming;
- Subscription pricing can be a consideration for students.
Pricing:
- Free trial available; subscription plans vary.
Illustrator (Adobe) – Image Creation
Created: 1987
Adobe Illustrator excels in vector graphics creation, ideal for artwork involving logos, icons, and typography. Unlike Photoshop, it maintains clarity regardless of zoom level, making it superior for text and graphic illustrations. Illustrator is well-suited for architectural applications like colorizing 2D drawings and creating simple layouts and diagrams.
Pros:
- Available on multiple platforms with a range of tutorials;
- Scalability of graphics without resolution loss;
- Industry-standard with a consistent Adobe interface.
Cons:
- Not optimal for modifying existing images;
- Not designed for extensive multi-page documents;
- Subscription cost considerations for students.
Pricing:
- Free trial available; subscription plans vary.
Adobe InDesign – Page Layout and Publishing
Created: 1999
Adobe InDesign is a premier tool for creating professional layouts for presentation sheets, booklets, and digital publications. It excels in assembling and organizing elements like text, shapes, and images created in Photoshop and Illustrator into cohesive layouts. Key features include grid systems, templates, style guides, and typesetting tools, enabling the creation of visually appealing and well-organized pages, chapters, and books.
Pros:
- Compatible with Windows and Mac systems;
- Simplifies the integration of images and text into versatile layouts;
- Offers a wealth of templates, styles, and organizational tools;
- Provides extensive tutorials and customer support;
- Recognized as an industry-standard tool;
- Familiar interface for users accustomed to other Adobe products.
Cons:
- Limited in creating vector graphics (better suited for Illustrator);
- Not designed for raster image editing (use Photoshop);
- Lacks built-in spell or grammar check features;
- Subscription may be costly for students, though alternatives are available.
Pricing:
- Free trial available, followed by various subscription options.
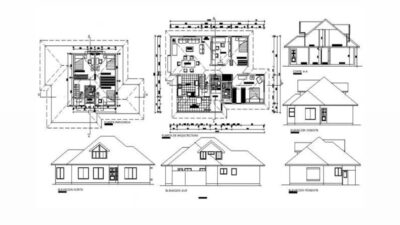
AutoCAD (AutoDesk) – CAD, 2D Documentation and Drafting
Created: 1982
AutoCAD, a pioneer in digital drafting, replaced traditional hand-drafting with a digital approach. It is primarily used for creating precise 2D architectural drawings like plans, elevations, and sections.
AutoCAD is versatile and suitable for both conceptual sketches and detailed documentation. It also interfaces effectively with other 3D software from Autodesk and other modeling tools like Rhino.
Pros:
- Available on both Windows and Mac;
- User-friendly with a gentle learning curve;
- Widely used in various industries;
- Ideal for foundational 2D drawing and documentation;
- Interfaces with other Autodesk 3D software;
- Offers a free version for students.
Cons:
- Limited 3D capabilities;
- Lacks integration with BIM and Revit software.
Pricing:
- Free trial available, with options for monthly, annual, or 3-year subscriptions;
- Free education version available with annual renewal eligibility.
SketchUp (Google) – 3D Massing and Modeling
Created: 2000
SketchUp is a user-friendly 3D modeling software, ideal for initial design stages and conceptual phases. It allows for rapid creation of 3D massing models, enabling users to experiment with form and volume.
SketchUp is excellent for crafting complex architectural visualizations and presentations. However, it should not replace CAD or BIM software for detailed design development or documentation.
Pros:
- Compatible with Windows and Mac systems;
- Intuitive and easy to learn;
- Robust user interface;
- Excellent starting point for 3D modeling;
- Extensive 3D component library with customizable textures;
- Free basic version available, well-suited for students.
Cons:
- Not a substitute for CAD software for detailed documentation;
- Limited rendering capabilities and basic visual graphics;
- Not designed for collaborative work.
Pricing:
- Free version available, with annual subscriptions for more advanced features.
ArchiCAD (Graphisoft) – CAD, BIM, 2D and 3D Integration
Created: 1982 (Released in 1987)
ArchiCAD stands out as the first software to offer 2D and 3D geometry creation on personal computers, as well as being a pioneer in the BIM product space. Targeted towards architects, interior designers, and urban planners, ArchiCAD integrates both 2D drafting and 3D modeling capabilities. Unlike AutoCAD and SketchUp, which are focused on either 2D or 3D, ArchiCAD allows seamless transitions between these two formats.
Pros:
- Available for Windows and Mac;
- Combines BIM technology with full 2D and 3D capabilities;
- Enables simultaneous 2D and 3D views;
- Includes rendering features;
- Free student version available.
Cons:
- Steeper learning curve compared to other software;
- Requires a high-performance computer;
- Primarily aimed at architectural professionals.
Pricing:
- Free trial available, followed by various subscription options;
- Free education version available with annual renewal eligibility.
Rhino (Robert McNeel & Associates) – CAD, 2D and Complex 3D Integration
Created: 1998
Rhino, or Rhinoceros, is a versatile CAD-based design software known for its exceptional capability in creating intricate organic and curved forms, which many other modeling tools struggle with. It seamlessly integrates 3D modeling with 2D drafting and documentation, allowing for both to be handled within a single platform.
Pros:
- Compatible with Windows and Mac operating systems;
- Capable of both 2D drafting and advanced 3D modeling;
- Supports a variety of plugins and scripting tools, including Grasshopper for parametric modeling and V-Ray for rendering;
- Interoperable with many other software platforms;
- Specializes in complex, curved, and organic modeling;
- Offers a 90-day free trial and competitively priced educational versions.
Cons:
- BIM functionality is only available as an add-on;
- Rendering capabilities are limited compared to specialized software;
- Not as widely used as some other industry-standard tools;
- The 2D capabilities are less developed than those in AutoCAD, but 2D work can be exported to AutoCAD for further development;
- The Mac version has reduced capabilities compared to the Windows version.
Pricing:
- 90-day free trial available;
- One-time purchase cost with ongoing updates included;
- Educational version available at USD 195 (non-upgradable).
Revit (AutoDesk) – CAD, BIM, and Team Working
Created: Initially started in 1997, with Version 1.0 released in 2000.
Revit is an all-encompassing software for building information, design, and documentation, tailored for professionals in architecture, engineering, and construction. It is specifically designed to support BIM workflows, allowing for the creation of complex models that represent all aspects of a building’s architectural and engineering systems. This makes it ideal for collaborative design and documentation across multiple disciplines.
However, it is not advisable to use Revit as a primary design tool during early design phases due to its complexity and the challenges of making rapid changes.
Pros:
- Available for Windows and Mac platforms;
- Part of AutoDesk’s software suite, ensuring compatibility with AutoCAD and other products;
- Strong capabilities for collaborative work, allowing large teams to coordinate effectively;
- Free trial and accessible pricing options.
Cons:
- Steep learning curve, often requiring in-person training;
- Complex setup for individual projects;
- Less intuitive interface compared to other tools;
- Not suitable as a primary design tool;
- Overly complex for smaller, individual projects.
Pricing:
- 30-day free trial available;
- Various subscription plans (monthly, annual, or 3-year);
- Free educational version available with annual renewal eligibility.
Software Learning Approach for New Students
As a new student in architecture, navigating the array of available software can be overwhelming. Here’s a suggested approach to gradually building your software skills:
Step 1: Graphics
- Adobe Suite Mastery: Start with one Adobe software and progressively learn others. The similar interface across Adobe products eases the learning curve;
- Photoshop: Begin by editing images and creating collages or concept visuals;
- Illustrator: Move on to simple page layouts;
- InDesign: Progress to assembling final folios or book layouts.
Step 2: CAD
- Initial CAD Exposure: Start with basic modeling and drawing tools;
- SketchUp: Use for developing simple 3D massing models;
- Rhino or ArchiCAD: Import SketchUp models for further 2D development and layout creation;
- Integrated Learning: Choose a CAD program with both 2D and 3D capabilities for comprehensive learning.
Step 3: Rendering
- Basic Rendering: Start by importing AutoCAD and Rhino drawings into Illustrator for basic rendering;
- Advanced Rendering: Gradually incorporate more complex programs like Grasshopper and V-Ray.
Step 4: Documentation and BIM
- Workplace Relevance: Learn Revit or other locally used BIM software before graduation, as many workplaces, particularly in Australia, favor Revit users for project documentation;
- Revit Application: Develop preliminary designs in SketchUp or Rhino and transition to Revit for design development or construction documentation.
This structured approach will help you build a solid foundation in architectural software, making you versatile and prepared for both academic and professional challenges in the field of architecture.
As you progress, incrementally add more tools to your repertoire. Each piece of software serves as an instrument in your broader architectural toolkit, enhancing your capabilities and versatility. In the latter stages of your degree, it’s prudent to research the software preferences of professional practices. Look into job advertisements, consult with tutors, and network with students already in the workforce to gauge the industry’s software standards.
If you anticipate a steep learning curve with new software, consider using holiday periods as an opportunity to familiarize yourself with it. For instance, take a project you’ve already developed and try rebuilding or documenting it using a different software. This proactive approach ensures that you’re ready to apply this newfound knowledge in the subsequent semester.
Remember, your student years are just the beginning of a lifelong learning and professional development journey in architecture.
Navigating Software Choices for Architectural Projects
Selecting the right software for your architectural projects is a crucial decision that can significantly influence the efficiency and quality of your work. Here are some guidelines to help you make an informed choice:
- Assess Project Requirements: Understand the specific needs of your project. Is it more design-oriented or does it require detailed documentation?;
- Software Specialization: Choose software that specializes in the task at hand. For example, use Rhino for complex 3D modeling and Revit for BIM-focused projects;
- Compatibility with Other Tools: Ensure the software you choose works well with other tools in your toolkit, facilitating a smooth workflow;
- User Community and Support: Opt for software with a robust user community and strong technical support, which can be invaluable for beginners;
- Budget Considerations: Consider the cost of the software and explore options like student licenses or free versions to stay within budge;
- Future Proofing: Think about the software’s relevance in the industry’s future and its potential for professional applications post-graduation.
The Role of Software in Enhancing Architectural Creativity
The selection and use of software in architecture extend beyond mere technical necessity; it plays a pivotal role in enhancing the creative process. Advanced software tools offer architects the flexibility to experiment with innovative designs, simulate various environmental conditions, and visualize projects in unprecedented detail. This creative empowerment leads to more refined, sustainable, and visionary architectural solutions.
Key considerations in using software for creative enhancement include:
- Experimentation: Use software to explore innovative design ideas and unconventional solutions;
- Visualization: Leverage advanced rendering and modeling tools to visualize complex designs vividly;
- Sustainability Analysis: Utilize software for environmental impact analysis to create more sustainable designs;
- Client Engagement: Use interactive 3D models and virtual reality to engage clients more effectively in the design process.
For those looking to delve deeper into the realm of creativity and innovation in architecture, exploring architectural design studios offers a gateway to understanding how professionals harness software to bring visionary designs to life.
Conclusion
From the onset of this guide, we’ve journeyed through the landscape of architectural software, exploring various tools and their unique capabilities. Starting with foundational software like Adobe Photoshop, Illustrator, and InDesign, we navigated through the complexities of CAD and BIM tools like AutoCAD, SketchUp, Rhino, ArchiCAD, and Revit. Each tool offers distinct functionalities, catering to different aspects of architectural design, from initial concept visualization to detailed documentation and collaborative project management.
For beginners in the field of architecture, the key is to start with a tool that aligns with your current needs and gradually expand your skills and toolkit. As you progress through your studies, it becomes increasingly important to align your software proficiency with the demands of the professional realm, ensuring your skills remain relevant and valuable.
Ultimately, the choice and mastery of software in architecture are not just about technical competency; they play a crucial role in enhancing creative expression, enabling architects to push the boundaries of design and innovation. As we conclude, it’s evident that the journey of learning and mastering architectural software is an ongoing process, essential for any aspiring architect aiming to make a significant impact in the field.